
Transcript: Implementing Cloud Volumes ONTAP Using Cloud Manager
Implementing Cloud Volumes ONTAP with Cloud Manager
Faisal: Hello everyone. My name is Faisal Salam. I’m a storage engineer with NetApp IT. I’m part of the Customer-1 solutions team. We manage all the storage used by NetApp. We’re also responsible for deploying ONTAP in the cloud and for automation. Today I have with me Raj Gunasekaran. Raj, why don’t you go ahead and introduce yourself.
Raj: Thanks Faisal. Hello, good morning and good evening everyone. My name is Raj Gunasekaran and I’m working as a cloud architect in the NetApp IT. I’m part of our Customer-1 cloud services team, and we are responsible for architecting the public cloud and private cloud, basically the hybrid cloud infrastructure.
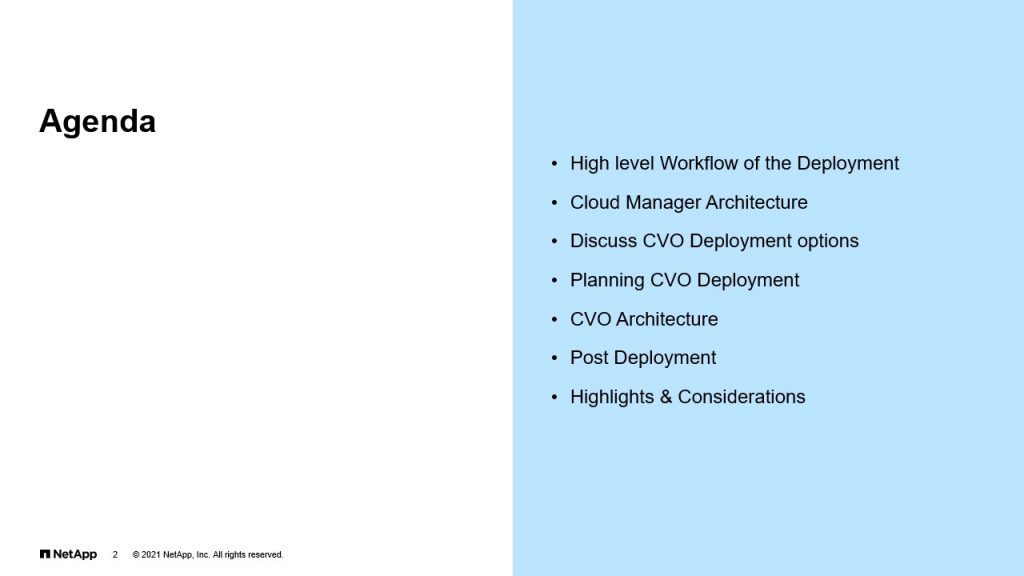
Agenda
Faisal: Here’s the agenda for today. So we start off with the high level workflow of the deployment. We talk about the Cloud Manager architecture. We discuss about the CVO deployment options, planning your CVO deployment, the CVO architecture, the post deployment steps, the highlights and considerations.
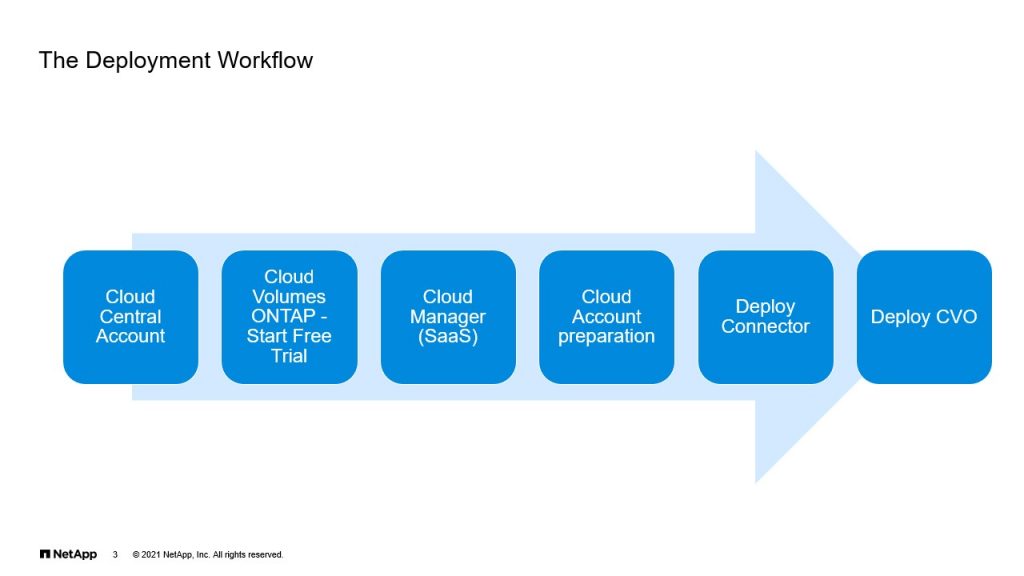
The Deployment Workflow
Faisal: Now the steps you’re going to discuss here are the same, regardless of which cloud you choose. Now to start the deployment, one of the first things you need is the Cloud Central account. Now I’m sure most of us are familiar with what that is, if you don’t, it’s cloud.netapp.com. That once you log into cloud.netapp.com using a Cloud Central account, and then you could use pretty much any services that’s available there.
Now, there are two ways in which you could do this. What I would prefer is a organization account. You could also have a personal account. So the way we’ve done it, is we have one central account and we associate all the other SSO IDs to it. That way, whenever you log in, you see all the resources within Cloud Central and Cloud Manager. Now if this is the first time you’re logging in, you have to click on Cloud Volumes ONTAP, start free trial and that spins off the rest of the steps. Which is logging into Cloud Manager, which is available as a software as a service solution today. And from there, there are several steps that you need to complete before you can deploy CVO. Now Raj, you want to go over the Cloud Account preparation?
Raj: Yeah. Thanks Faisal. So first, the three steps, you work on that Cloud Central and then followed by Cloud Manager SaaS to get prepared yourself. And then, whichever the cloud you’re going to use, you are going to do some preparation on the cloud specific, their own UI. So in our case, we are going to discuss about AWS Cloud, because that is where our primary workloads run and that’s what our primary public cloud partner. So in the upcoming slides, we are going to discuss about what is the exact preparation that needs to be done. It’s also very documented, but in this case, you might need to log into that AWS console to get prepared with the policies, permissions, rules and also cloud specific network related infrastructure. In this case, it’s AWS VPC and the Transit Gateway, all those things. So these things need to be done by the cloud team or the cloud expertise and it’s using the Cloud Native Console. Then you can, again, go back to the Cloud Manager to get started with the Connector. Faisal, you can take over.
Faisal: Thank you. So once you’ve completed all the steps that we’ve discussed, then they go to deploy a Connector and the Connector is important. It’s a prerequisite, before you can deploy Cloud Volumes ONTAP, and we’re going to see more details of this in upcoming slides.
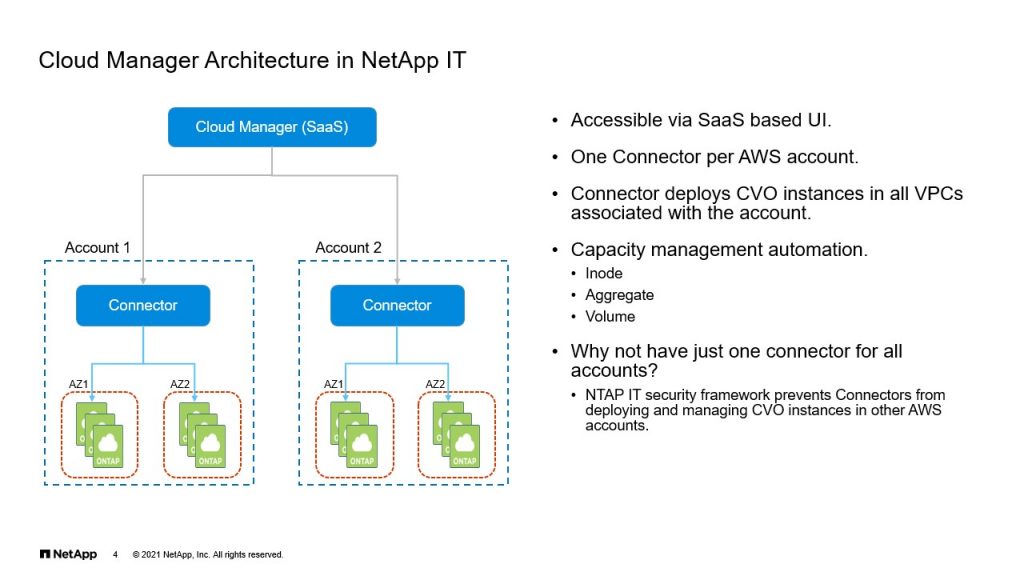
Cloud Manager Architecture in NetApp IT
Faisal: As I mentioned before, Cloud Manager today is available as a software as a service. So that’s your one-stop shop for anything related to Cloud Volumes ONTAP. But once you log in with the right credentials, you have a pane that shows you all the Connectors that you’ve deployed. Now, the way we deploy is a Connector per account. So as we see here, you have account one with the Connector, and then you have the ability to select a VPC. And then you could deploy in one of the three models, which is a single availability zone, a multi availability zone or you could just do a single node CVO.
Now, one of the interesting aspects of Cloud Manager is, it also assists with capacity management automation. Now, if you’ve worked with on-prem ONTAP, which I’m sure most of you have, you’ll know that things like inode and aggregate and volume. Now there is no automation that’s available today out of the box, you’d have to write some code up using Ansible or some scripting languages. But Cloud Manager does most of this for you, right? With just a switch that you turn on. Inode management is taken care of, as well as aggregates. Now, all we really need to do is manage volumes and as you deploy more volumes, Cloud Manager adds disks. It can also create new aggregates for you and if there is an aggregate that doesn’t have any volumes, Cloud Manager deletes that off.
Talking about volumes, right? As soon as you create a volume, all the autogrow options are set for you by Cloud Manager. So all of this is enabled from Cloud Manager. Now you’d ask, why not have just one Connector for all accounts? That’s possible and you could definitely do that. Now, the reason why we have adopted a standard of having a Connector per account, is because the current security framework prevents Connectors from deploying CVU instances and managing them effectively, if they’re in another account.
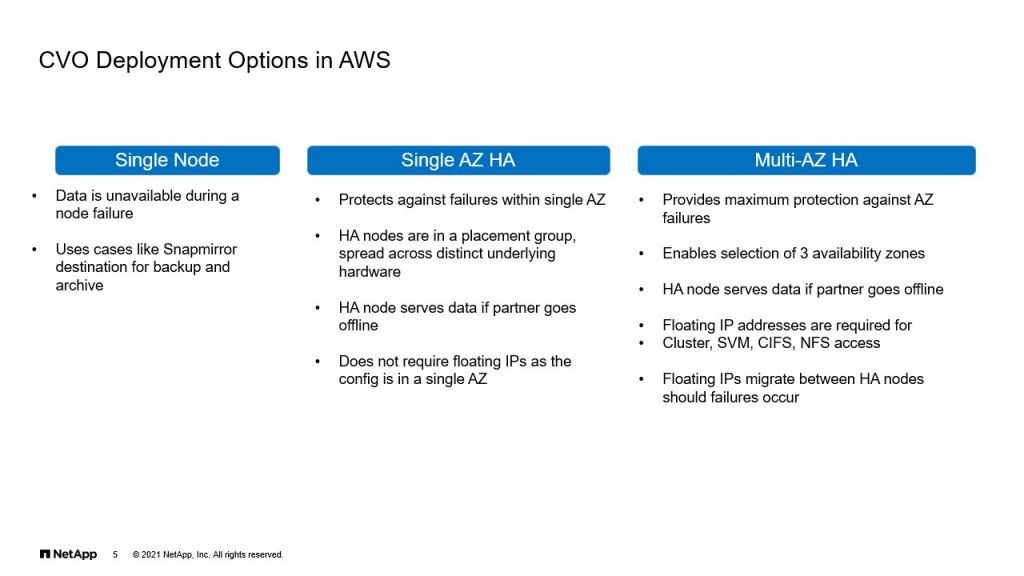
CVO Deployment Options in AWS
Faisal: These are the different deployment options that are available today and I’m talking specific to AWS. So the first deployment model that we tested is a single node CVU instance, which from the name offers very little in terms of fault tolerance. So if you had a failure at the hypervisor level or an availability zone level, you lose access to your data. Now, we’ve decided to, based on the standards that we have and the data protection requirements, we’ve decided to use this model as a SnapMirror target. Now, the other model that we’ve tested is the single availability zone HA. Where both nodes of the CVO, as well as the mediator, which we will talk about in upcoming slide, are all in the same availability zone. Now it does simplify deployment and the number of steps and the number of logical components, to drive the whole solution. However, it comes with a problem where if you had a availability zone failure, you would lose access to all of your data, because both your nodes and the mediator are all in the same availability zone.
So the third deployment model and the one which we’ve adopted as a standard for production workloads, is the multi availability zone HA model. Where the three components, namely the node one, the node two and the mediator, sit on different availability zones. So this offers the maximum fault tolerance that’s available today. Now there are some additional steps here, like configuring floating IP addresses. Now, when we talk about AWS, subnets on one availability zone are not available in the other availability zone. So this does pose a problem for failover. So any logical interfaces, the failover from one availability zone to the other. If you do not have a floating IP address assigned, you’d not be able to connect to those lifts. And hence we have floating IP addresses that must be configured. Now we will talk more about these floating IP addresses in an upcoming slide. Raj, is there anything that you’d like to talk about here?
Raj: Yeah. So about the choosing the availability zones, good to mention here. So it depends on the customer’s workload, right? So which AZ or what sort of fault tolerance they need. So in the single AZ HA, it provides a failover against the hypervisor level failover and also, it is a less architecture wise, it’s a less complicated and easily manageable. It may be beneficial when you or a customer, having a workload in a single AZ and most of their applications are going to access from that single AZ.
Whereas in multi-AZ we have to be careful or be considerate of choosing which AZ you want to deploy, node one and node two. Because it also derives where that workloads are accessing from. So let’s say an instance is running from one AZ and I prefer to place the volumes that are accessed by those application systems from the same AZ. So that you can reduce the data transfer cost between AZ to AZ. In AWS it is charged per gig when you are transferring between the two availability zone, even within the same VPC. So in order to avoid that cost, we have to consider it and deploy an instance in a workload required AZ, that will be the perfect placement. That’s it. Thanks.
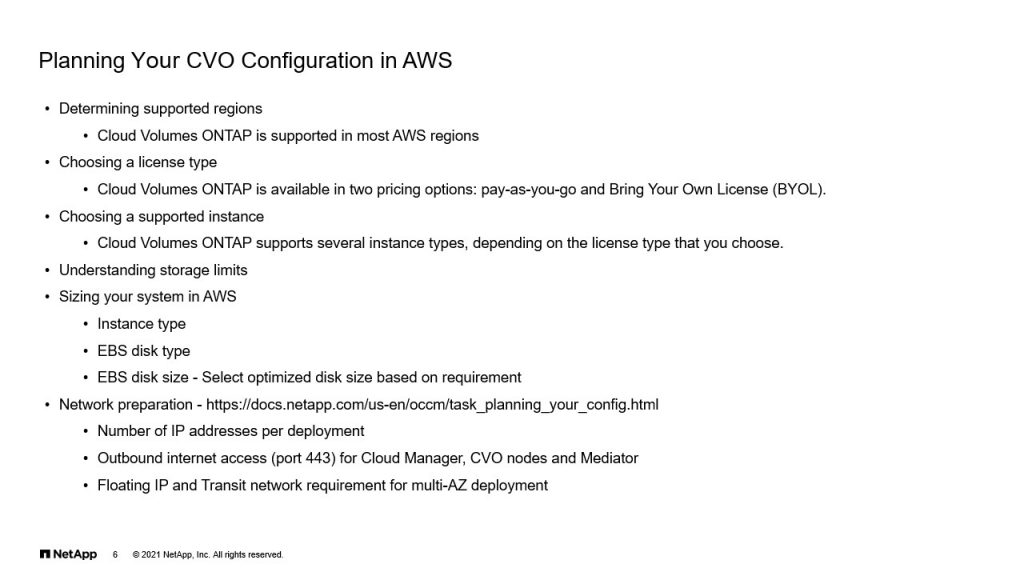
Planning Your CVO Configuration in AWS
Faisal: Thanks Raj. Okay. Now, how do we go about deploying CVO? Right. Before we start, there’s several things that we need to kind of gather or have a checklist of before we can get started. Right? One of the things is finding out what region support CVO. Now, although it is supported in most regions, you just want to make sure that where you intend to deploy is available on the list. And the documentation actually mentions this very clearly. The other thing is, choosing the right license type. Now you have a couple of options, right? If you’re one of the customers who likes to pay-as-you-go, you have a pay-as-you-go license, or you have a BYOL subscription-based license. Now again, even if you selected the BYO license, the cloud resources that you utilize, you will still be charged for those, regardless.
Another important step is choosing the right instance type. Now, if you look up the documentation, there are many different instance types you could choose from, right? Starting from very basic, AZ2 instance types. The ones that support Flash and support a very high amount of throughput. Now, you would have to decide which one fits best in your environment, based on a couple of factors, right? Mainly, looking at what application workloads are going to be hosted and what throughput are you looking to attain?
Now, you also need to keep in mind the storage limits. Things like the disc type, what is the maximum disk size? And that again, decides how large an aggregate can go. Again, you should keep in mind that the CVO, the size to which that can grow is limited by the EC2 instance type. Those are the several different things and the documentation that we have on the support site simplifies all of this for you. So I strongly encourage that you read the documentation entirely, before you go ahead and deploy. Now talking about the storage itself, the aggregates utilize EBS volumes as individual discs. And there is a limit on the number of disks that you can have in an aggregate and the number of aggregates themselves. The network preparation. Raj, do you want to talk about that?
Raj: Yeah. So the network preparation is mainly focused on what sort of deployment model you choose. In our case, we chose a multi-AZ HA as our primary production workload deployment. So depends on the deployment, we need a number of IP addresses per node basis and for HA cluster and also, we need to think about the floating IP. So the floating IP, we are going to discuss more in detail in the next slide. So basically here, the consideration is how many IP addresses we need per deployment, which is mentioned in the link provided there. And also, all the nodes, including Cloud Manager and CVO nodes and Mediator. They required an outbound internet access on port 443, which is required for the normal operation.
And on top of it, if in case it is related to AWS, we need to provide a Transit network. So the Transit network is documented in the NetApp support site is, AWS Native Transit Gateway Solution. So that Native Transit Solution provides the connectivity for the floating IP addresses outside of the VPC. Within VPC, you don’t need a other transit gateway functionality. Because the floating IP addresses are programmed in the routing table of the VPCs or the subnet, whatever the routing table it is being used. But as if you need a connectivity, which in case most of the cases we needed, for example, managing the instance itself. Then you need to provide the connectivity outside of the VPC, for example, from on-prem or from other VPC. Then you need some sort of a transit network there and we will discuss further about this in detail in the next slide. Thanks Faisal.
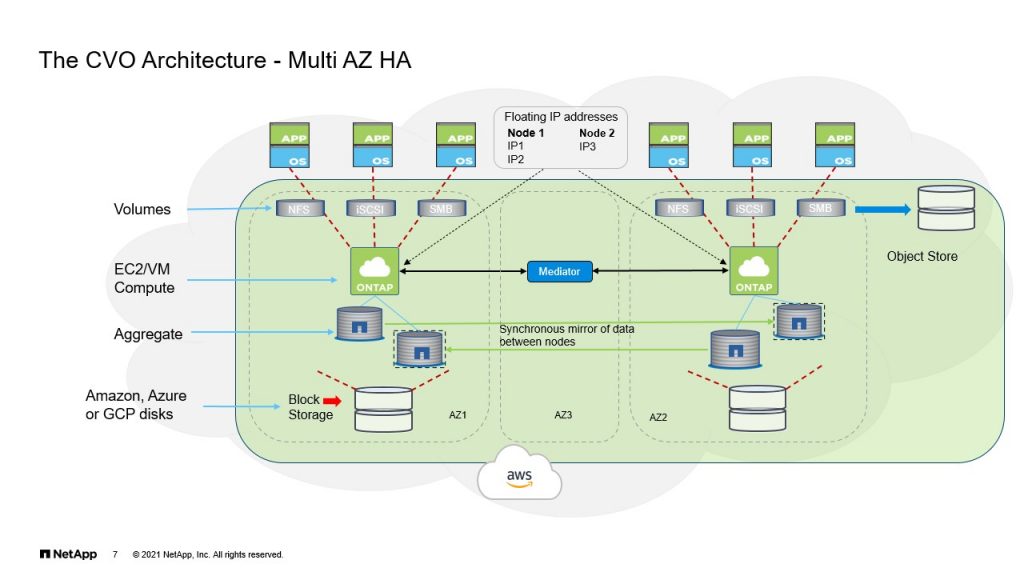
The CVO Architecture – Multi AZ HA
Faisal: Thanks Raj. All right. So here we’ll take a look at the Cloud Volumes ONTAP architecture, and this is specific to the multi availability zone deployment. So as you can see here, there are three main components to the CVO deployment. So there is the node one, which here, you see in availability zone one. The node two, which is an availability zone two and the Mediator, which sits in between in availability Zone three, right? The architecture itself is very similar to the on-prem ONTAP that we’re all familiar with. Now, one of the differences is the storage that it consumes. So as we spoke about this before, this is EBS volume, when we talk about AWS. And each EBS volume is treated as a single disk, and those disks are put together in creating the aggregate.
Now, one of the things you need to bear in mind is, because this is the cloud, there is no concept of sharing storage, right? Like in on-prem ONTAP. So we use sync mirroring to mirror the aggregate using Plexus. So if you have data being written to an aggregate on node A, you have the same data being mirrored to an aggregate that’s a Plex, that’s attached to the node B. Because this is the EBS volume that’s attached to note two and vice versa. So any data that’s written to node B, is replicated to node A, and this is accomplished by sync mirroring and by using Plexus.
And again, when we looked at the CVO deployment, we saw that it comes up in an active-passive mode. Which means node B does not have an aggregate during the initial deployment. And if you intend to use it in an active-active mode, which is the way we have set it up, you would have to create the data aggregate on node B using Cloud Manager. You also have the ability to tier to and S3 bucket, as it’s shown here. And we also need to look at the floating IP addresses, which Raj is going to talk about.
Raj: Yeah. So as I explained in the previous slide, so floating IP plays a major role in the multi-AZ HA configuration. So as you all know, the limitation of AWS, the subnet can span across only the single AZ. So essentially in this configuration, node one will have its own set of IP address and node two will have its own set of IP addresses. But as you cannot fail over one lift, which has IP address on from subnet one to other node, because then the node two, you don’t have the subnet available. So to solve the problem, NetApp has come up with this floating IP. The main restriction on the floating IP is, it should be completely outside of the IP range of the sider block of the VPC itself. So the VPC has one sider range and you cannot have a floating IP from that side of it.
So we chose to have a different side of range, but still it is part of our NetApp corporate IP ranges. So that we don’t have any complication on the routing perspective. So within the VPC to reach the floating IP addresses, the mediator will choose or we can choose what are the routing table that are being used by the instances. So that the mediator will take care of the automation of the program. It’s responsible for programming the floating IP address to the specific ENI. So in this case, for example, if the node one has a lift with the 192 168 1.1, let’s say an IP address has a floating IP. The mediator will program that IP address as a /32 IP address, as a single IP address pointing to the EMA of the ONTAP node one.
In case of a failure, the mediator knows, because it’s been monitoring the instance, it knows the new node went down. So it is going to reprogram the routing table to find the same IP address with the EMA of the node two. So that’s how the floating IP, the failover works. So that the client knows where to reach for the data. When it comes to the floating IP access outside of the VPC, that’s where the transit network requirement comes into picture. Because traditional VGW, you cannot manipulate the routing in desired way. Whereas, if you have an AWS transit gateway, you can have a multiple routing tables per VPC basis. And the mediator will also program the routing table on the transit gateway in such a way, that wherever the lift currently lives, that EMA will be pointed as a next hop address for the specific floating IP address.
This similar solution, we are also adopted, but we don’t use an AWS Native Transit Gateway Solution, but we use a third-party solution. But the concept is the same. Whenever there is a traffic comes out of the outside of the VPC, be it on-prem or another VPC. That’s going to look into the transit network portion of the routing table and see or it can determine where that lift at this moment lives, and the traffic will be forwarded to that specific instance. And this automation is completely behind the scene and taken care of by Cloud Manager and Mediator. What else? That’s pretty much it. Yeah. Thanks Faisal. If you have any questions on this topic, we can take it in the next slide.
Post Deployment Steps
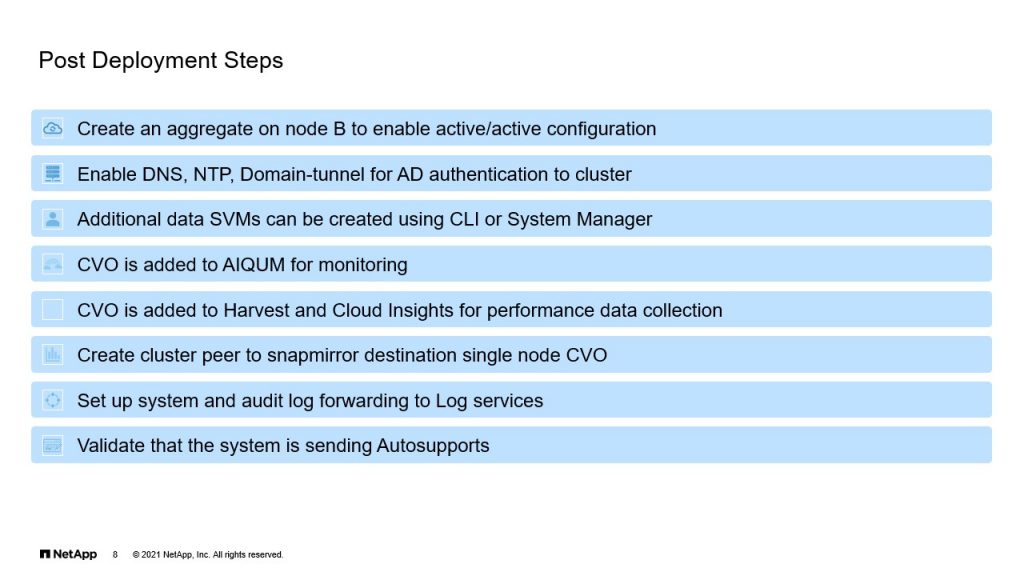
Faisal: Thanks Raj. Okay. So at this point, we are done with the deployment. Now, there are several steps that you would require to take, based on what your standards are. Now, these are some of the steps that we go through. Now, as we spoke about the way CVO is deployed, it comes up in an active-passive mode. Meaning node B is essentially on standby mode and it receives the aggregate from node A when there is a failure. But if you would like to use it in an active-active mode, you could create aggregate on node B and this has to be done using the Cloud Manager, which is what we do today. There are some of the other steps that we go through, like enabling DNS, NTP and we like to treat CVO like a ONTAP cluster when it comes to administration. So we create the domain-tunnel, so that the storage team can log in and take any steps that’s required, if we get any alerts.
Now, when you deploy CVO, it comes up with a single data SVM. You can create additional data SVMs. I think that limit is 24 with the most recent release. Now, with each additional SVM, you would have to install an add-on SVM license. And we also add CVO to Active IQ Unified Manager for monitoring, just as all of our on-prem clusters. And we also add CVO to Harvest and Cloud Insights for performance data collection. Now, today we create a single node CVO and use that for backup and data protection purposes. We also use log forwarding, we have set up our clusters to forward the system logs and audit logs to a Log server like Splunk. We also make sure that the system is sending AutoSupports. And these are just some of the steps. There are many others and they could be specific. For example, a customer could decide to set it up in a slightly different way, or maybe not configure log forwarding. But these are some of the standards that we use at NetApp IT.
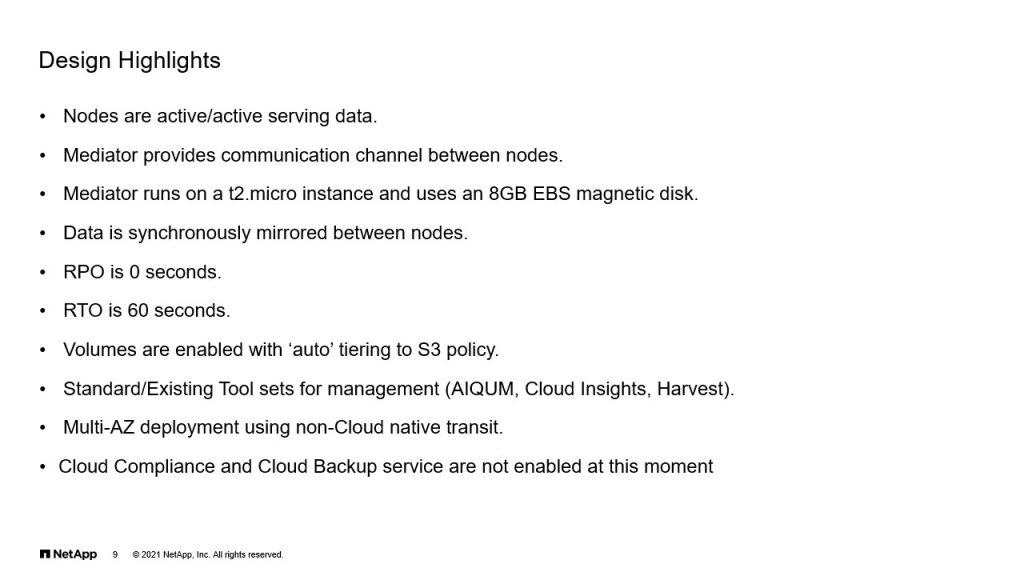
Design Highlights
Faisal: Okay. So this is like a summary or design highlights. Again, the nodes are active-active and both of them serve data. The mediator’s main function is to provide communication and it monitors both the nodes and helps in a successful failover. And the mediator uses a t2.micro instance in AWS and it uses an 8GB EBS magnetic disc. The data is synchronously mirrored between the nodes, using Plexus and using SyncMirror. The RPO is zero and the RTO is 60 seconds and this is what NetApp has tested. And what that essentially means, is if there was a failure, it would take up to 60 seconds before you could gain access to your data. Now, the volumes are all enabled with the auto tiering S3 policy. Now there are other options that you could select, but we’ve selected auto. Now you could choose to only have snapshots tiered. You could also select cold data to be tiered and that is determined based on a certain number of hours of inactivity.
There are different options that are available to choose from, if you were to tier to S3 to lower costs further. Now, we add the CVO to all of our existing tool sets like AIQUM, Harvest and Cloud Insights. And like Raj mentioned, we do have a gateway known as Aviatrix gateway, that we’re using for the multi-AZ deployment. And that’s what facilitates the floating IP addresses to failover between the availability zones. And you have the option to enable Cloud Compliance and Cloud Backup service, but we have not enabled it this time. We’re currently testing it out and we do intend to enable it in the near future.
Considerations
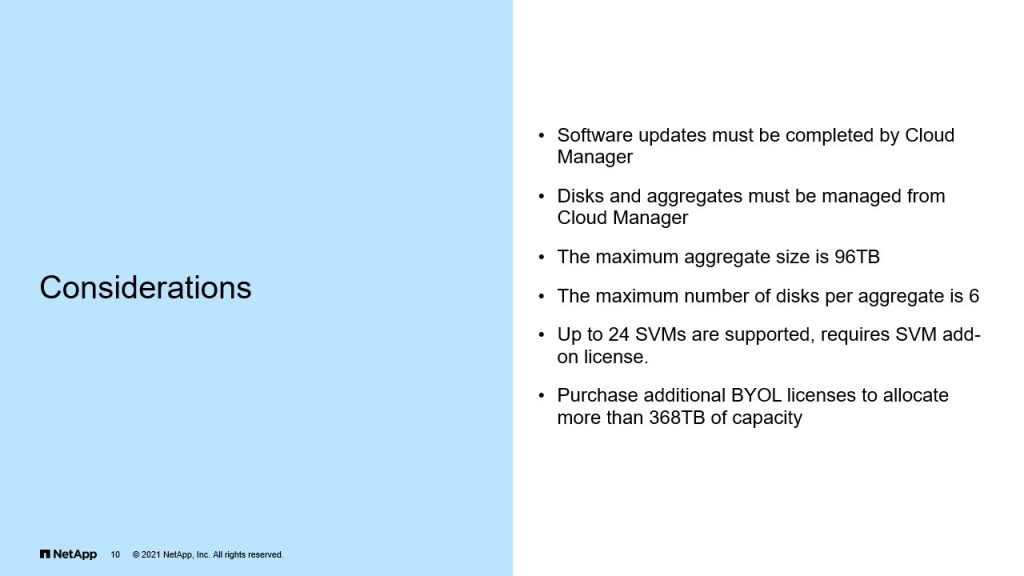
Faisal: These are some of the considerations. Now, software updates, as recommended by NetApp must be completed from within the Cloud Manager. You’re not advised to use the CLA, because it can lead to system instability, as well as discs and aggregates. If you had to create a new aggregate or you had to expand an aggregate, it is recommended to do this from within Cloud Manager. Now the maximum aggregate size for CVO is 96. The maximum number of discs is six. Now, we should keep this in mind when we do capacity planning and during the initial deployment. SVMs like I mentioned, a maximum of 24 are supported and this requires an add-on license per SVM. The initial max capacity is 368, with the BYO license. You can go upwards of a petabyte, if you purchase additional BYO license. Thank you very much.